Compare
  Favorites
  My Account




Mounting Rainway
In order for the Rainway gutters to serve for a long time and not to bring trouble to the owner of the house, it is very important to initially correctly mount the rainwater system. To your attention is a video tutorial on installing Rainway gutters. What is required for the installation of gutters, what rules must be followed and how to install the gutter yourself - you will find all this in our video instructions or step-by-step instructions below.
Step-by-step instructions for installing a rainwater system.

Before installing the rainwater system, it is necessary to determine the location of the drainpipes, taking into account the direction of water drainage, the location of the ground drainage points and the appearance of the facade. One running outlet is installed at no more than 10 lm. gutters.

Using a cord, determine the slope towards the drain, approximately 2 cm by 10 lm. gutters and install the gutter brackets around the edges at the highest points.
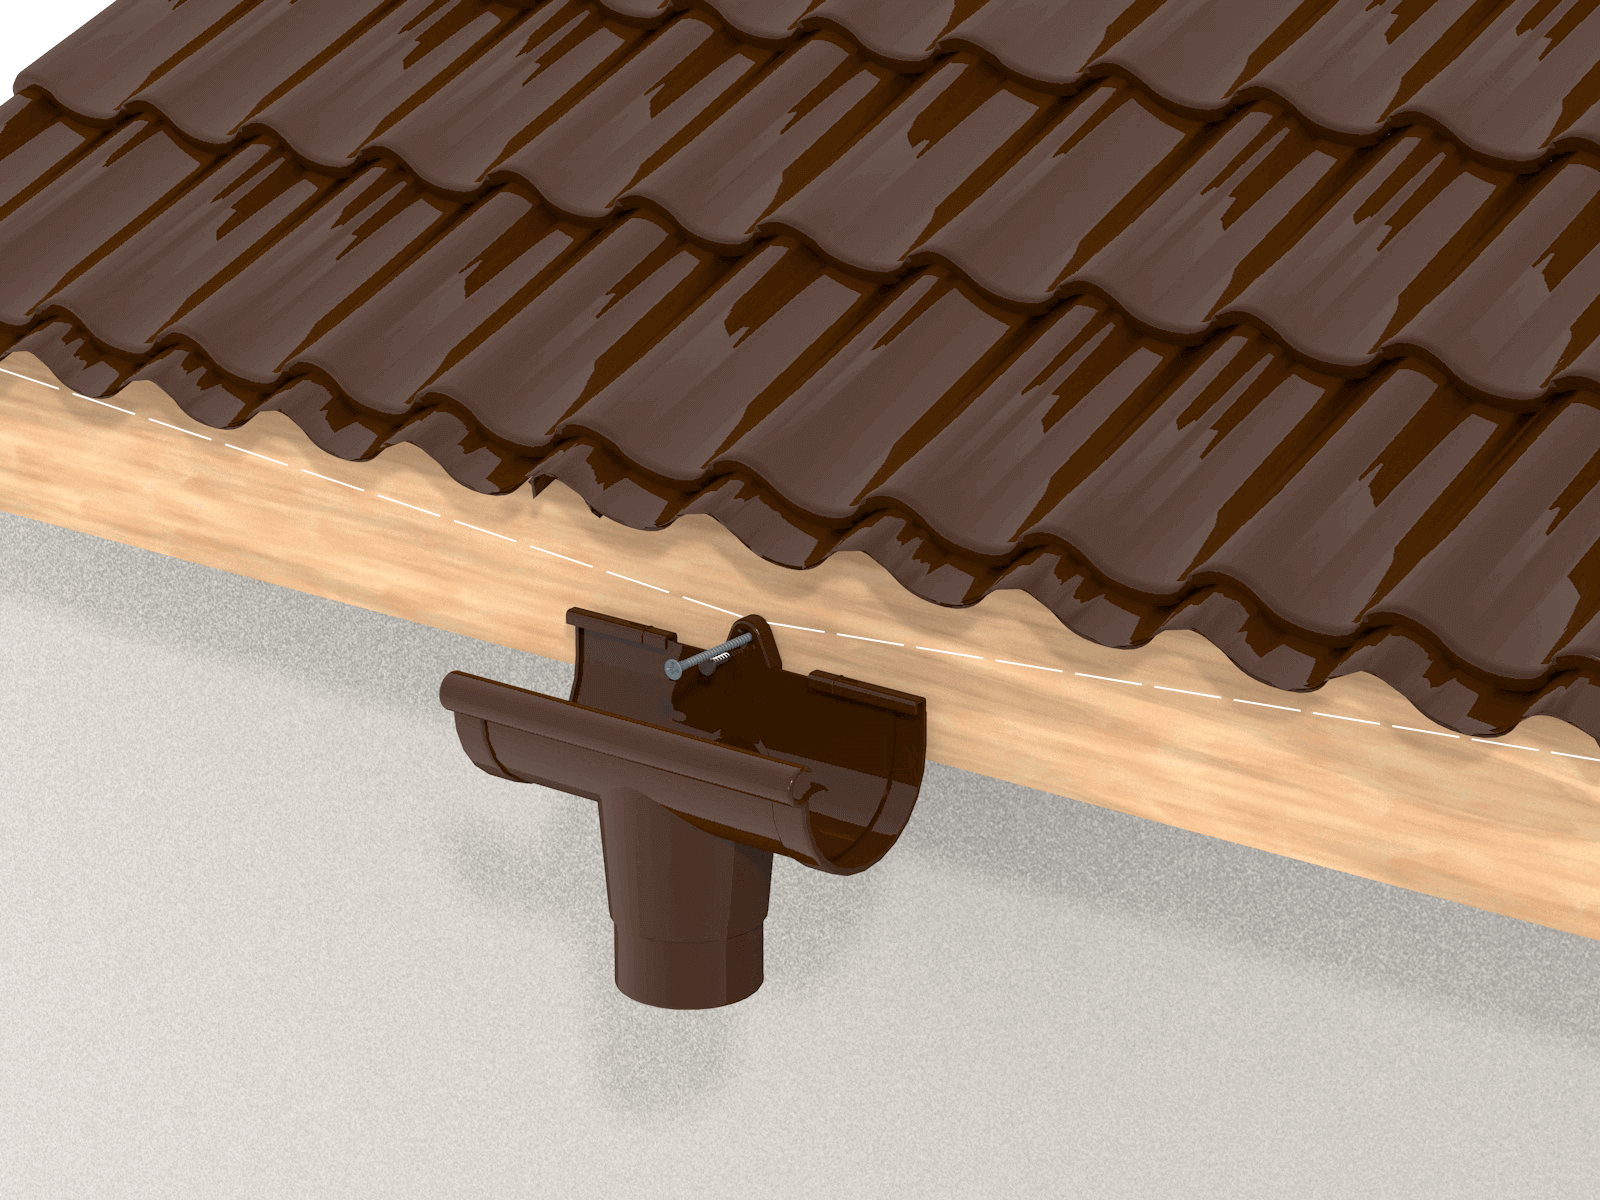
Install runnig outlets in the places where the drain is arranged. The running outlets should be at the lowest points of the gutter systems.

The gutter brackets are installed at the rate of 6 pieces per 1 gutter, but no more than 55 cm, and no further than 10 cm from the running outlets, gutter unions and gutter angles.
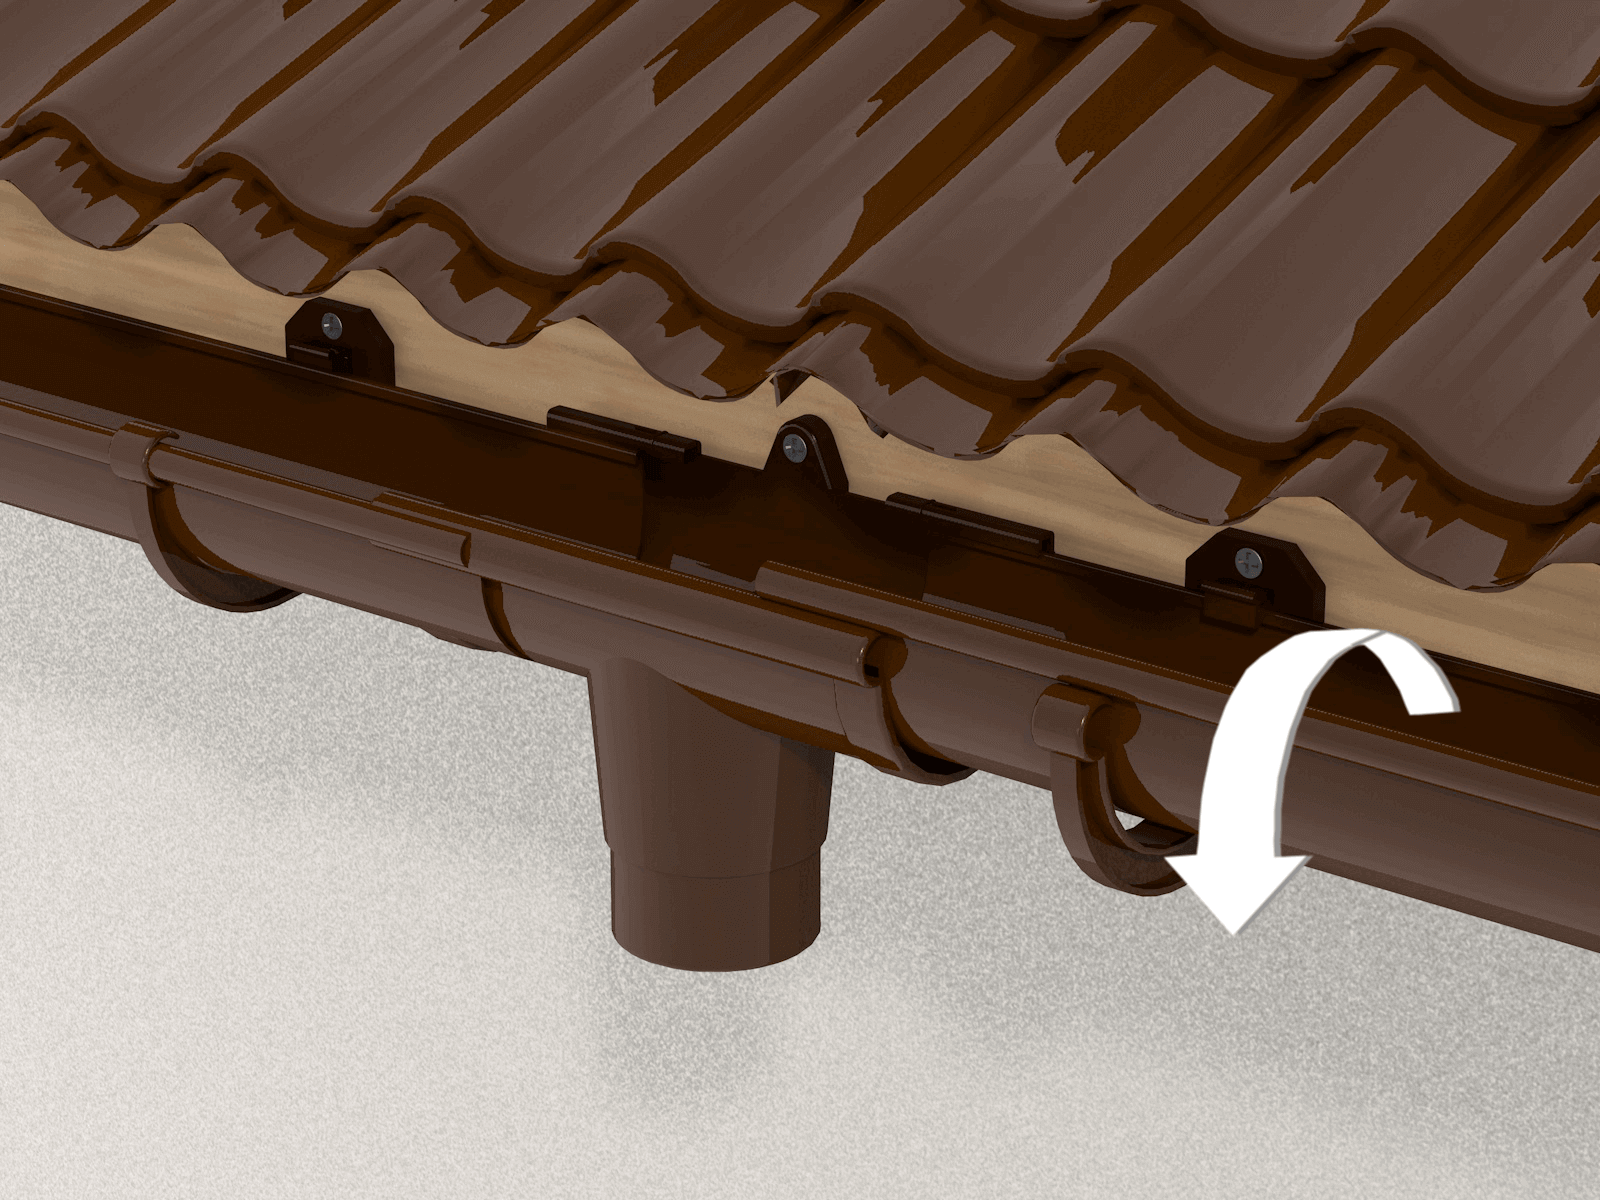
The gutters are installed starting from the running outlet. The edge of the gutter should be at the level of the marks on the running outlet. The gutter is inserted into the brackets and connecting elements starting from the back wall of the gutter.
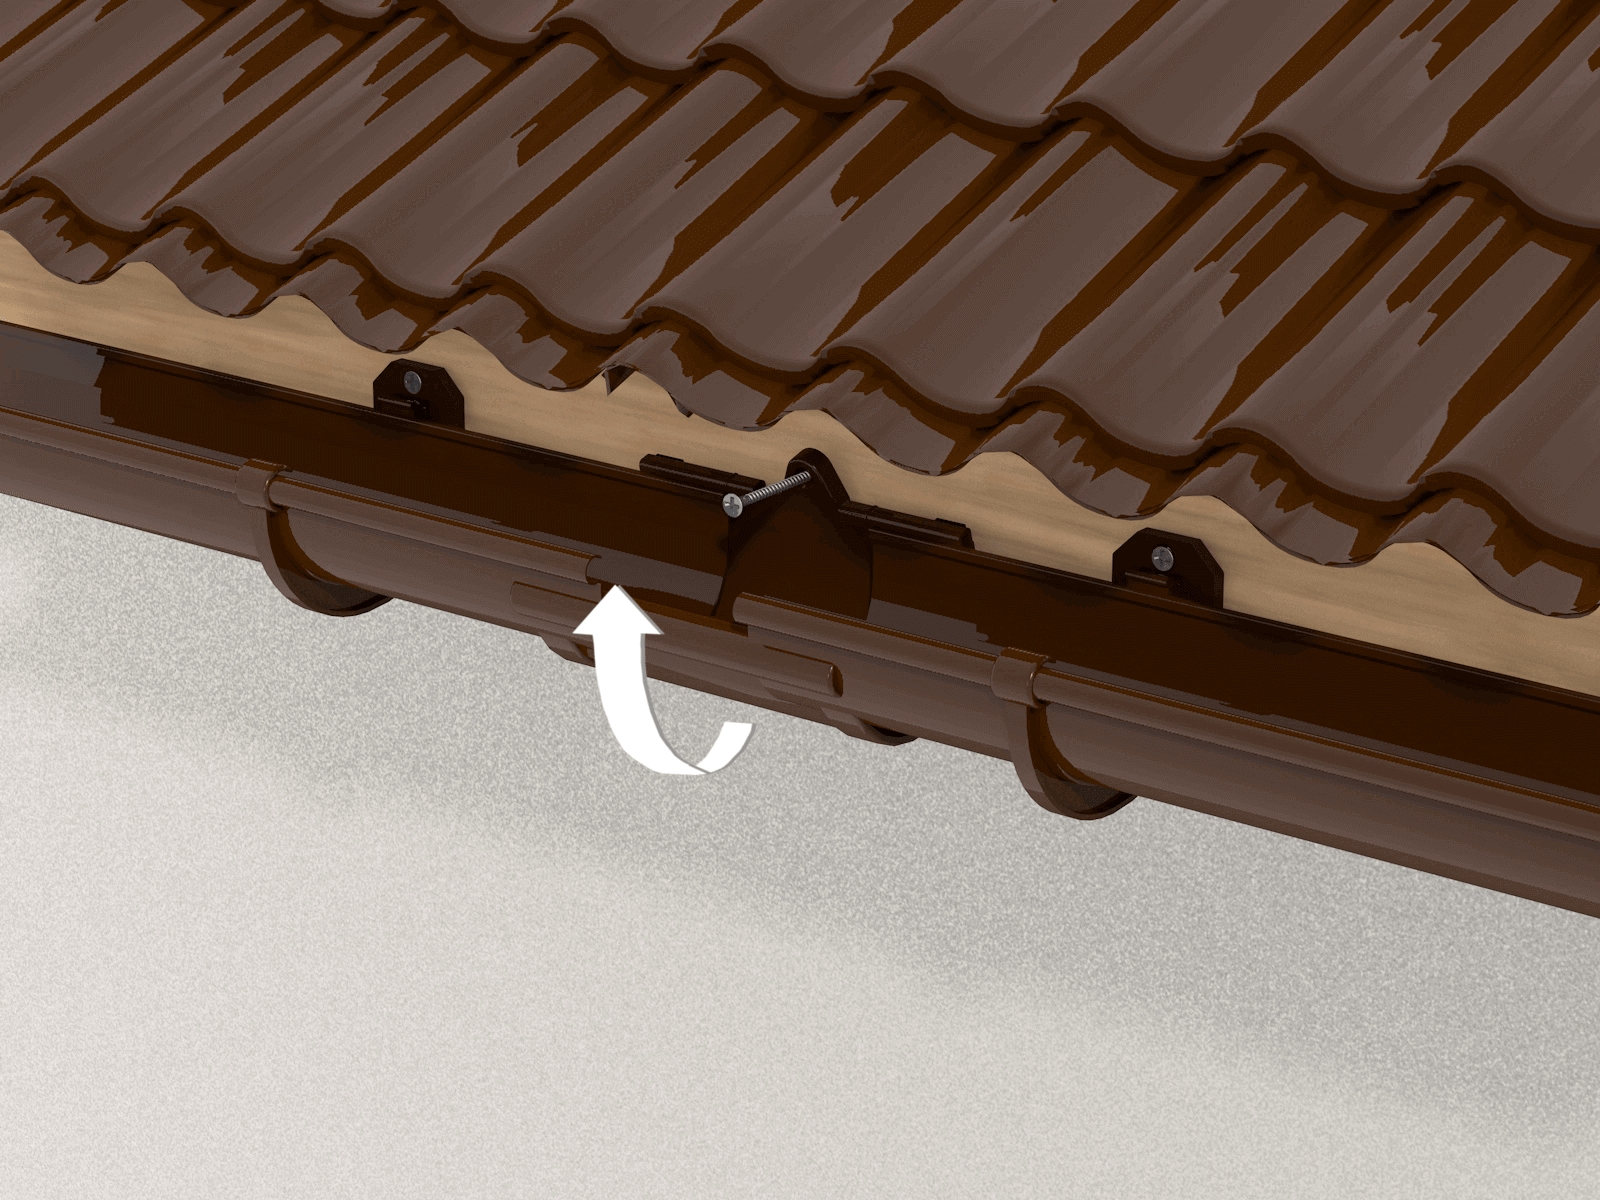
The gutters are connected using a gutter union. The edges of the grooves should be in line with the marks on the sleeve. Once connected, the gutter union is attached to the wind board.
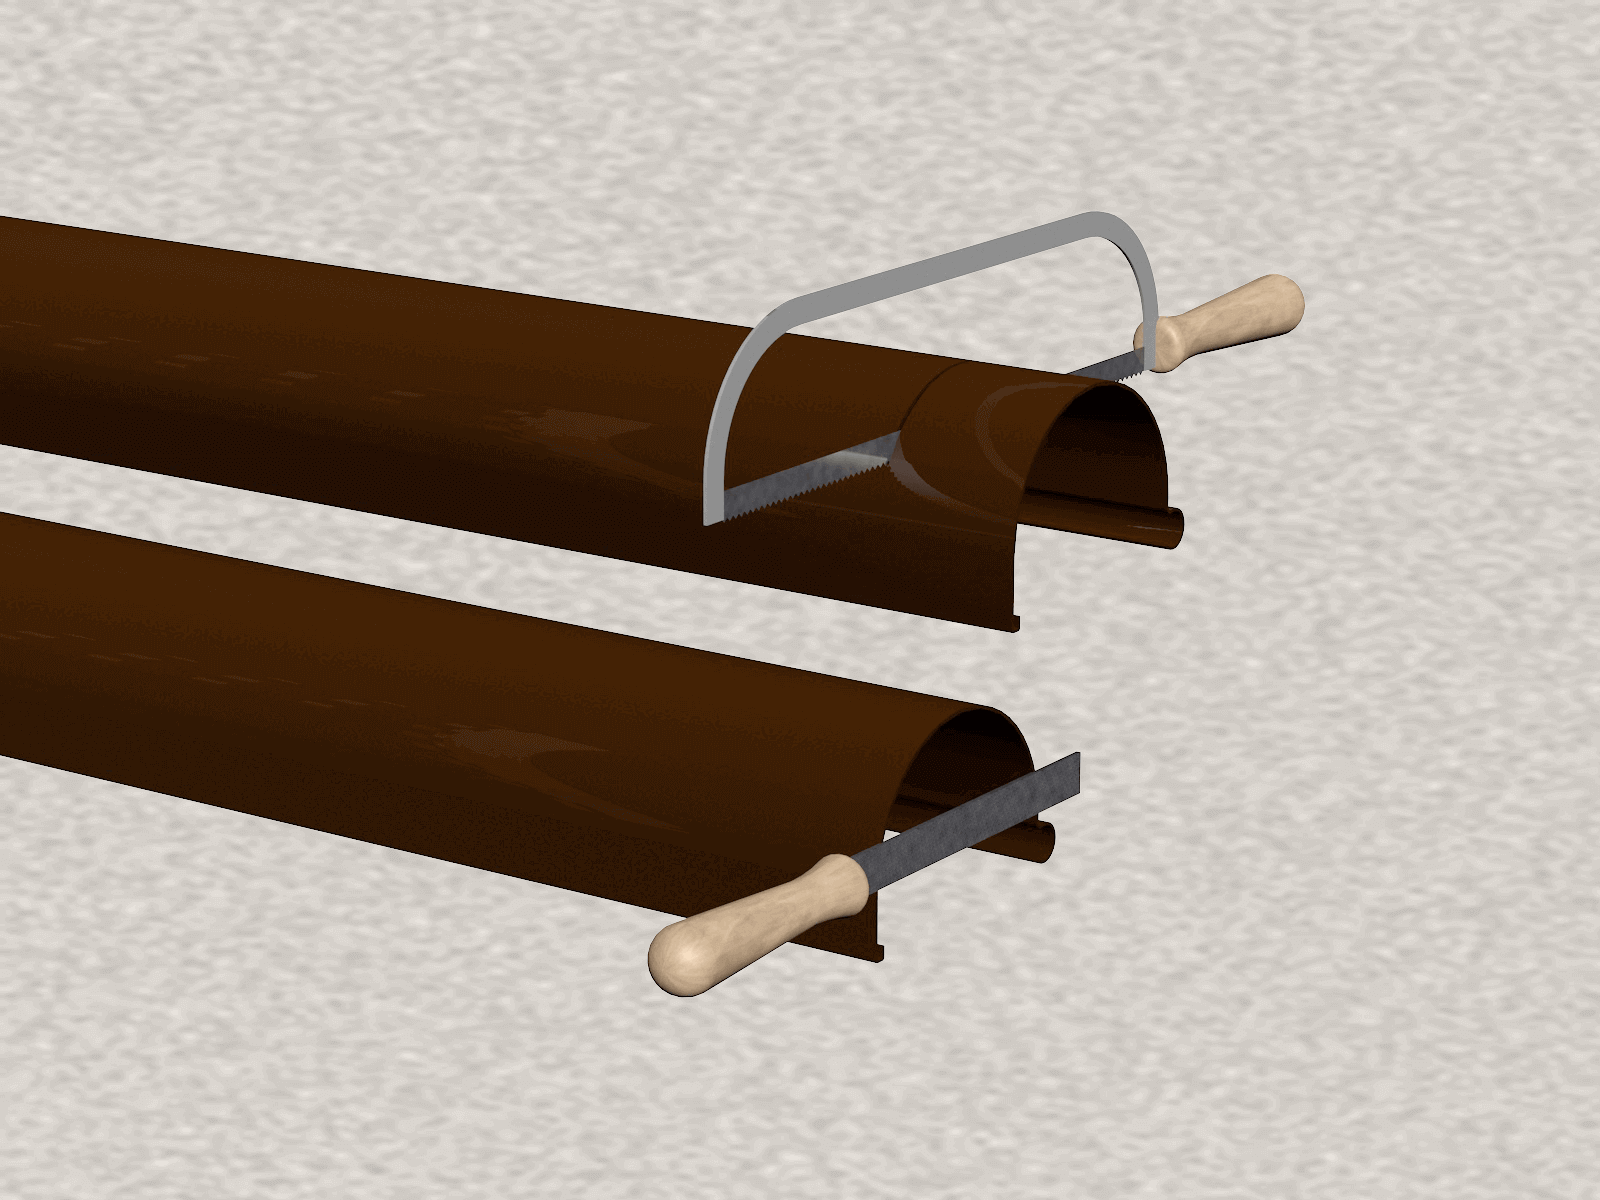
A hacksaw for metal is used to cut gutters and pipes. Burrs are cleaned with a file.
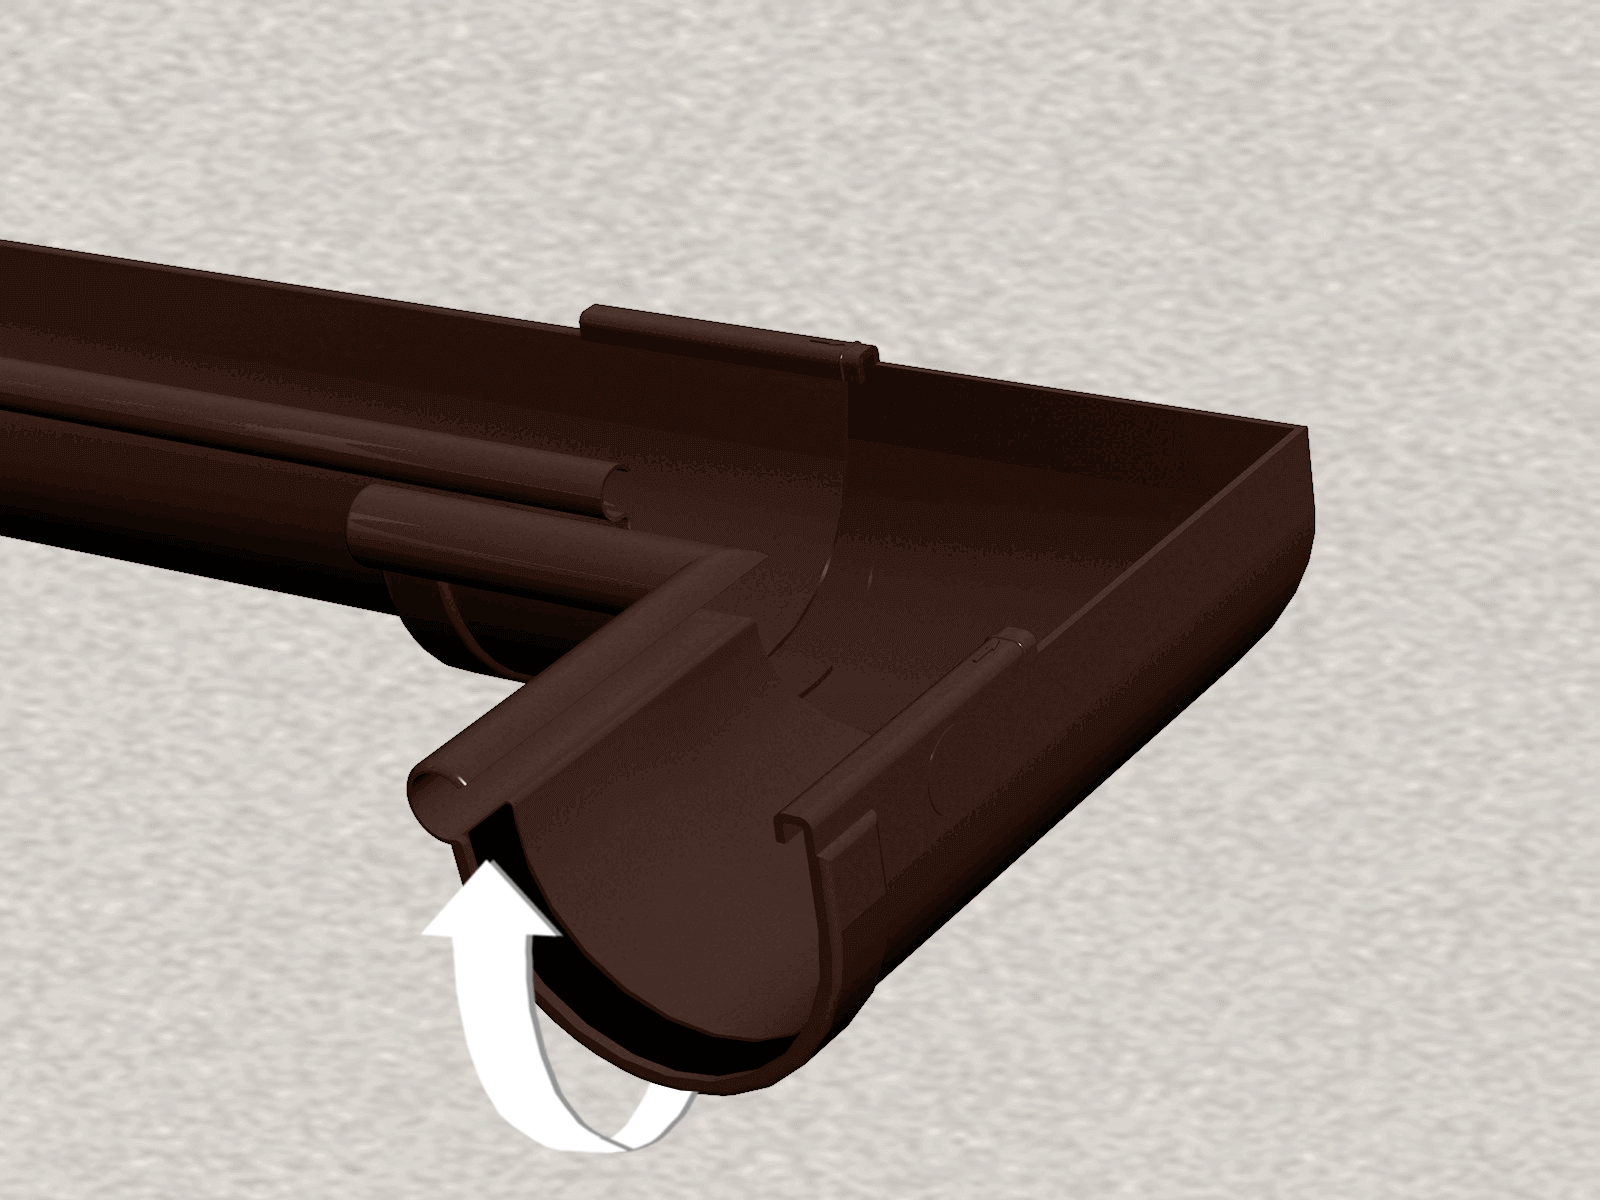
The gutter angles are mounted according to marks similarly to gutter unions.

The stopends snap into place at the end of the system. The distance from the stopends to the side roof board or to the wall is at least 3 cm.
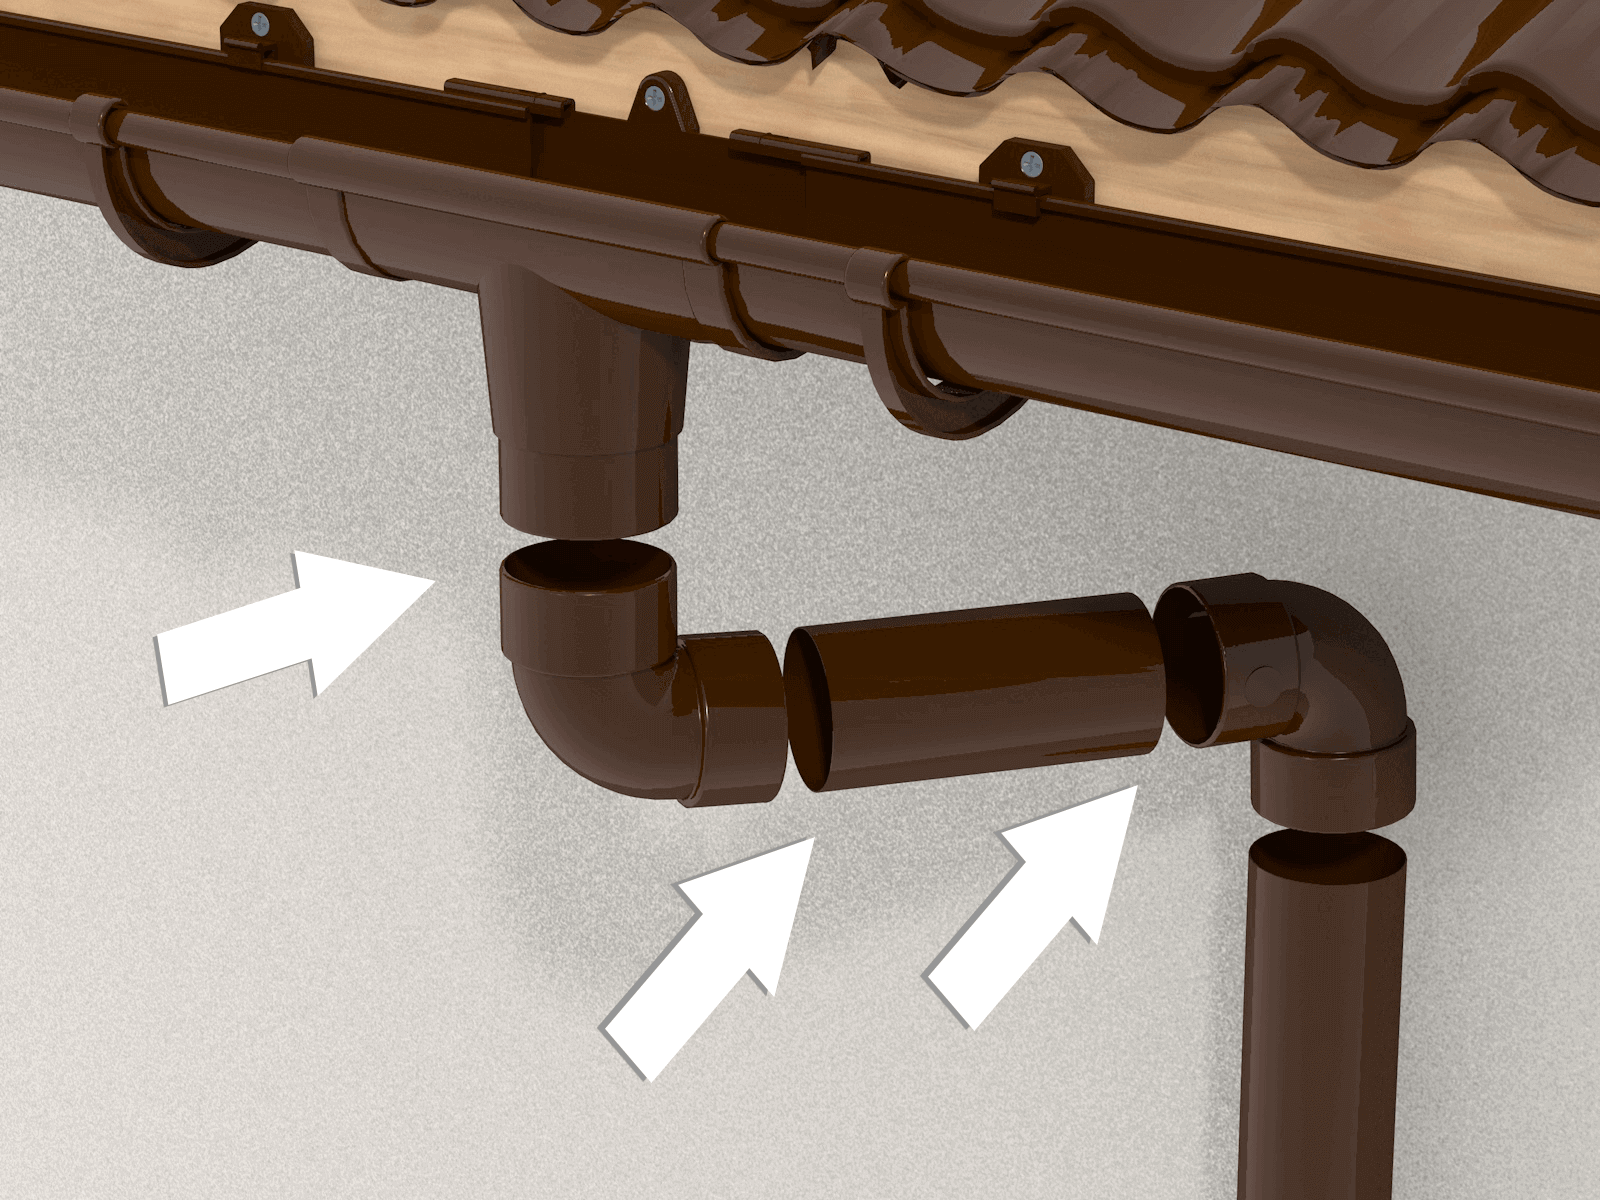
Installation of pipes starts from the runnig outlet. With a significant roof extension between the double socket bends (67 * or 87 *), a pipe section is used. To avoid sagging pipes, it is recommended to fix them with connecting elements using PVC glue, sealant or other means (rivets, self-tapping screws L-12mm)
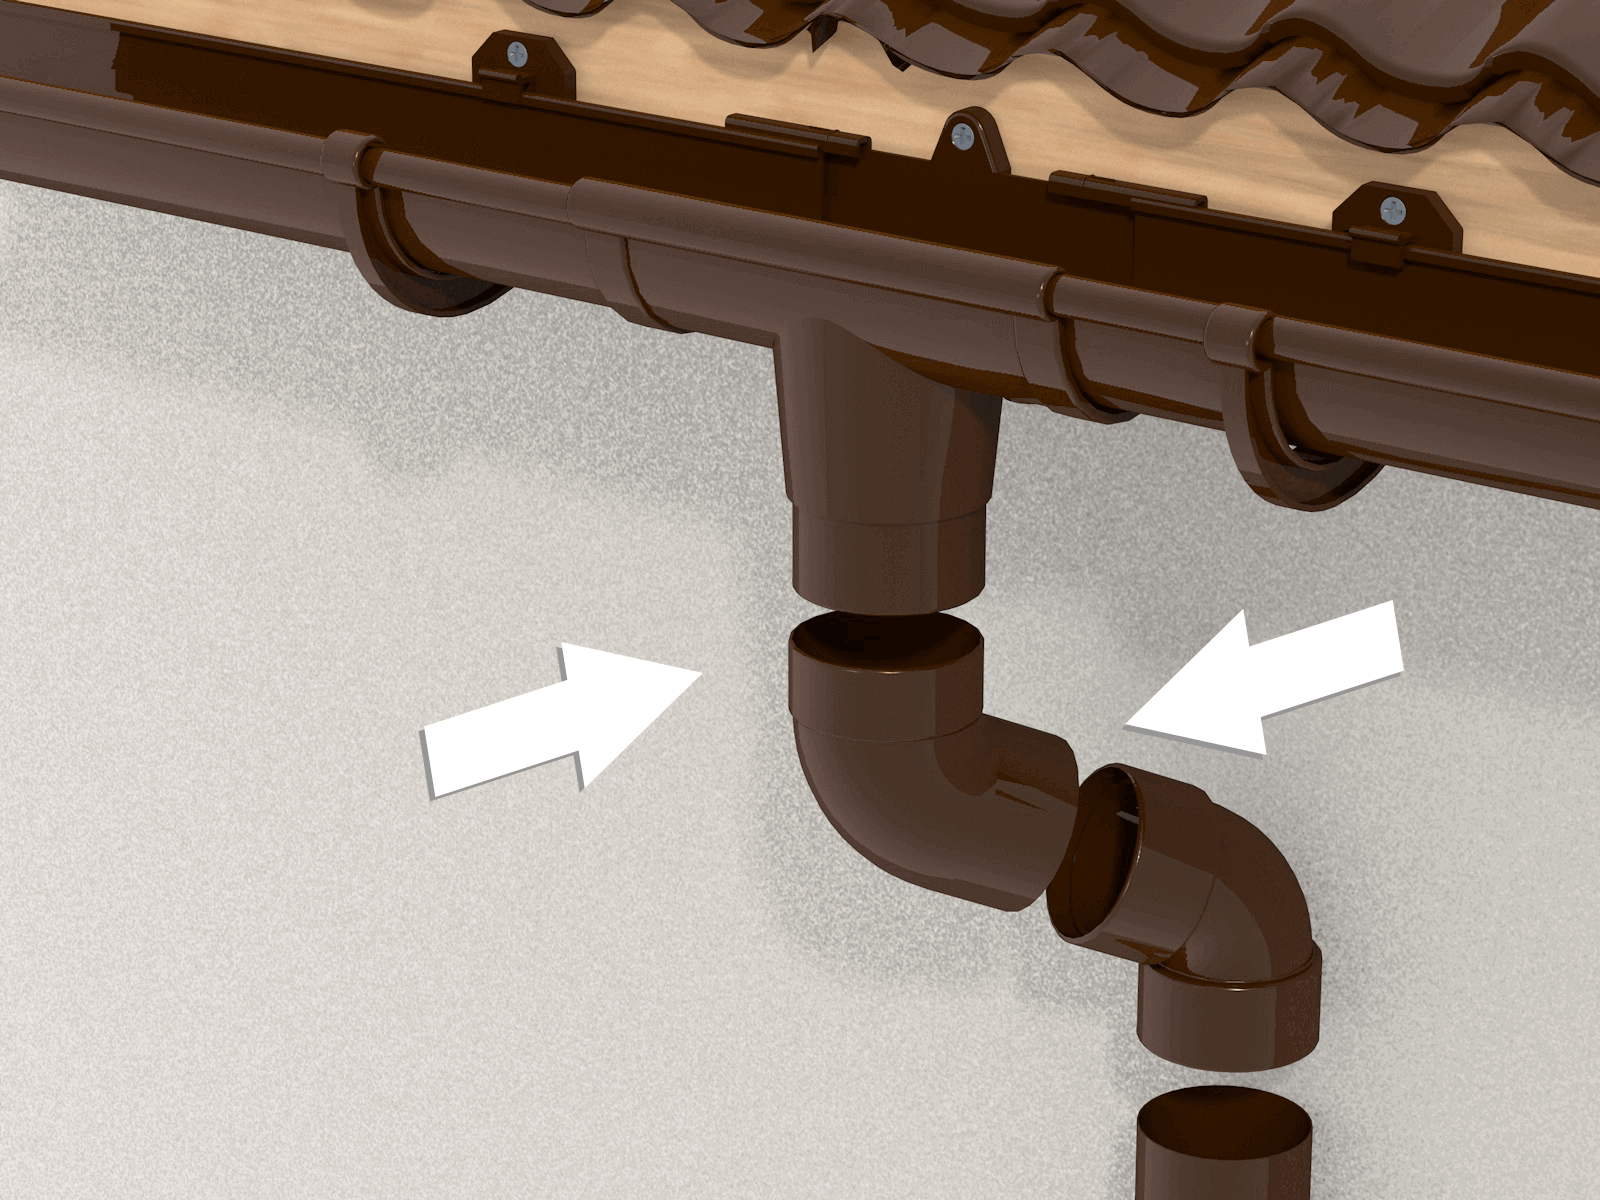
With a small removal of the roof relative to the wall using a pipe coupling or a combination of single socket and double socket bends. The arrow on the couplings and taps indicates the direction of water flow, and is always directed downwards. Recommended fixation (see step 10).

A downpipe bracket is installed directly under the bend. When inserting pipes, leave a gap of about 10 mm for linear expansion. No glue is used.

Couplings are used to downpipe connectors. An arrow on the sleeve indicates the direction of water flow and always points downward. A bracket is installed under the coupling. Due to thermal expansion, the down tube is not fully inserted. The gap is approximately 10 mm. Fixing pipes with a coupling is not allowed.

Downpipe brackets are mounted on the wall by means of dowels and special screws. The distance between the brackets should not exceed 1.5 m.
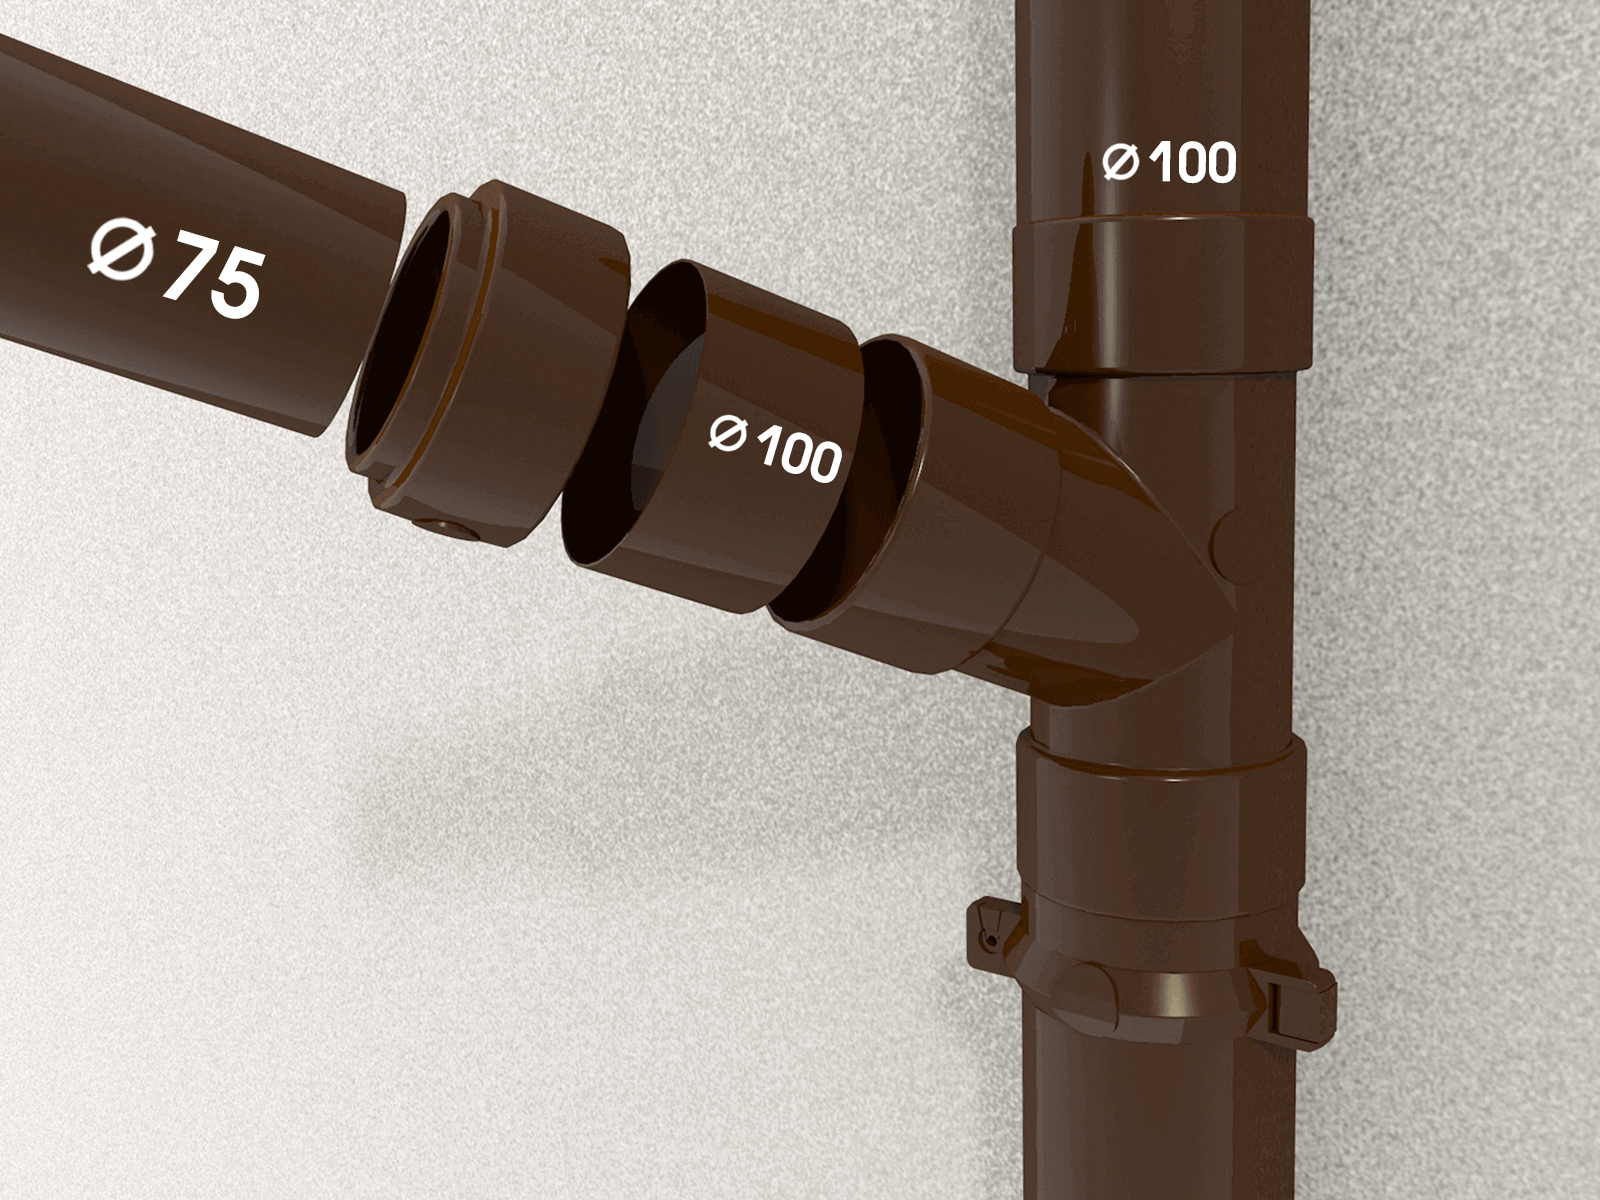
Branchs are installed in the same way as connectors. In the case of connecting a 75 mm pipe to a 100 mm pipe through a branch, an adapter is used.

The lower bend is fixed to the pipe (see step 10). Only PVC glue is used for gluing. The pipe is fixed with a bracket. Distance to the bend is 2 cm, distance to the ground level not less than 20 cm.


Small distance from the gutter plug to the building wall.
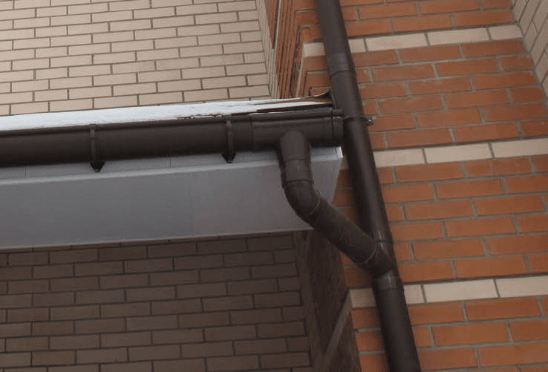
Installation of gutters at negative temperatures.

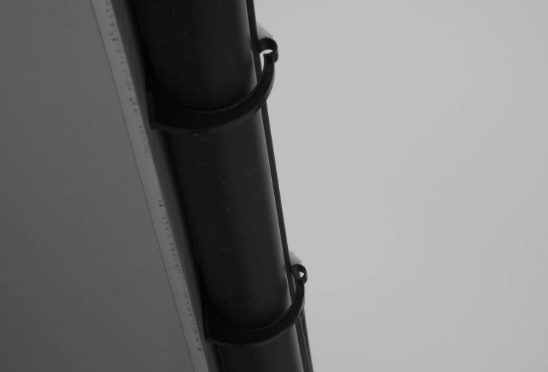
Unlatching, inserting the grooves into the brackets not until they click.
- The wrong choice of the size of the system and the number of funnels - because of this, the system will not be able to cope with the flow of water. Usually the result of unprofessional calculation;
- installation of the gutter without a slope towards the funnel - because of this, water will accumulate in the gutter. This problem does not seem to be a serious problem, but in winter, the liquid will freeze, forming ice plugs. After a couple of years of operation in this mode, the structure will require serious repair;
- improperly assembled pipes or incorrectly installed fasteners - this defect will affect the strength of the structure, and can also increase the risk of cracks, leakage, etc.;
- non-compliance with the temperature regime - plastic gutters must be installed at a temperature not lower than + 5 ° C. This is necessary for the polymerization of sealants and assembly mixtures;
- poorly inserted grooves into the brackets;
- small distance from the gutter plug to the building wall.
A variety of soffits make up a modular system that has a specific purpose. They protect cornices, projections, and roof linings from the negative effects of rain and snow. Vinyl soffits have also proven themselves to be excellent protection for attics, mansards, and so on. They are installed using anti-corrosion nails and screws immediately after the roof is installed. The soffits must be cut in accordance with the parameters of the eaves overhang, but thermal expansion must be taken into account.
The soffit structure consists of the following elements:
- Smooth panel for lining fronts and cornices, without ventilation effect (best used for gazebos, canopies, and other open structures);
- Perforated panel can be used for any structure, as it has excellent air permeability;
- J-profile is the starting and ending element for fixing soffit panels;
- H-profile connects the panels, fixes specific elements at an angle, and acts as a guide profile.
Observe the temperature regime - installation should be carried out at temperatures above 0 ° C.
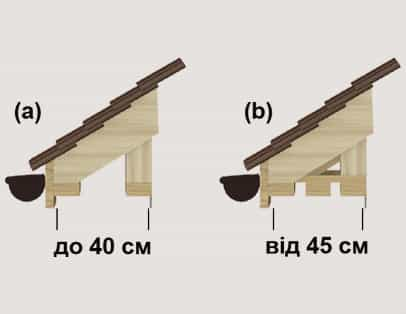
Prepare dry wooden battens. The slats are installed along the perimeter of the eaves, parallel to the walls, at a distance of no more than 45 cm (a). If the width of the eaves is greater than 45 cm, attach the soffit additionally in the middle (b).

Install the J-profiles on the rails. The distance between the screws should be 20 to 30 cm.

The soffit panel, cut according to your project, is installed in the grooves of the J-profile and fastened with self-tapping screws. In this case, it is important to leave a gap of 2-3 mm, which is needed to compensate for the linear expansion of the material.
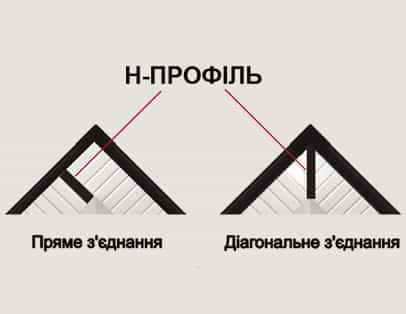
There are two options for horizontal corner joints: straight and diagonal. To connect the panels at an angle, we use the H-profile. For diagonal joining at the corners, trim the soffit panels and other elements at an appropriate angle.

To connect the front and eaves of the roof, use the outer corner and the connected J-profiles (as the inner corner).
WARNING!
- The panels must not be stretched;
- If the width of the cornice overhang exceeds 45 cm, fix the spotlight in the middle.
- The spotlight is not intended for operation under direct ultraviolet rays.
Premium Rainway soffits provide a beautiful and functional finish for the space under the roof. The wide-plank effect and natural wood grain give roof structures an aesthetic appeal. The satin finish of the panels creates a soft, pearlescent sheen. Hidden perforations, invisible to the naked eye, ensure the necessary ventilation for the roof and attic. Premium soffits are made of durable vinyl, which provides strength and flexibility, preventing deformation, delamination, and cracking.
The Premium soffit system consists of the following components:
- A soffit panel with concealed perforations is designed to ensure proper ventilation of the roof and attic. It is used to finish the lower part of the roof space - the eave overhang;
- The H-profile is designed to connect panels to one another. It is used as a guide profile to secure soffit sections at an angle, in horizontal planes, when lining the eaves of a roof;
- The J-profile is used as a starter and finishing profile for securing soffit panels;
- The outside corner is designed to join corner joints along eaves and gables.
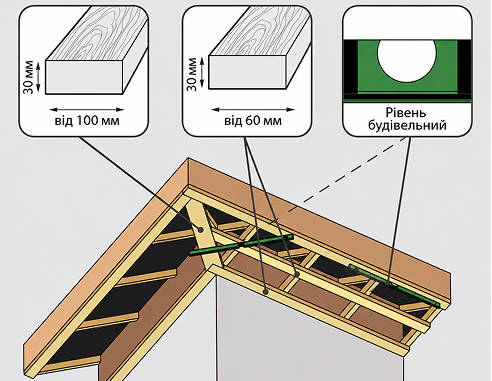
Montaż konstrukcji nośnej wykonanej z drewnianych listew.
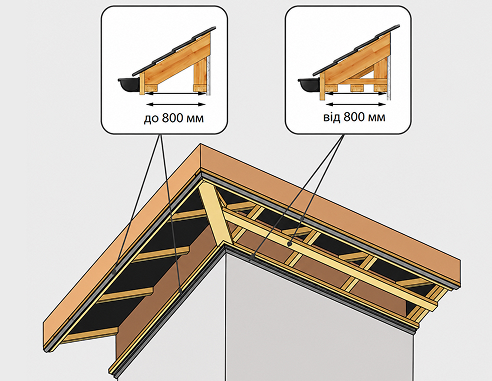
A diagram showing how to install wooden slats, depending on the length of the roof overhang.
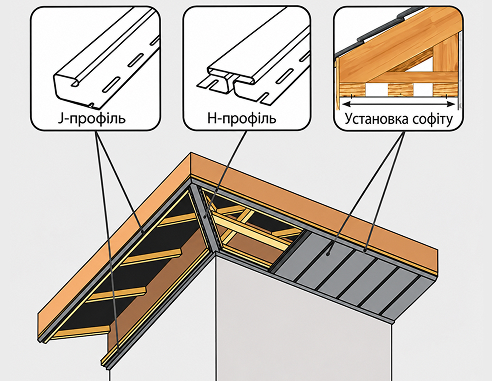
The diagram shows the installation of J and H profiles and the installation of soffit panels.
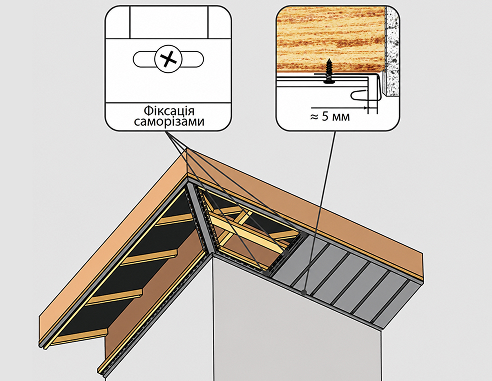
Connection point between the panel and the J-profile. Screw in the self-tapping screws only through the center of the mounting hole. Do not screw them into the body of the profile. Do not tighten the self-tapping screw all the way; leave a small gap between the head and the panel to allow for free horizontal movement.
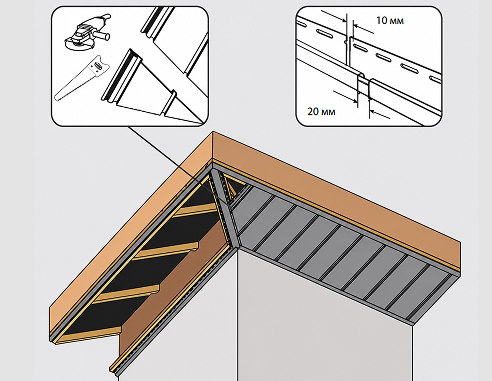
Обрезка и монтаж панелей софита.

Recommendations and advice for installation
- Install the unit at temperatures ranging from 0°C to +30°C.
- Before beginning installation, unpack all the panels, lay them out on a flat surface, and compare their colors. A slight difference in shade is acceptable.
- For scaffolding, use wooden planks made of high-quality wood, free of knots, dry (with a moisture content of 14–19%), properly treated with an antiseptic, and with minimum dimensions of 50 × 25 mm.
- Use standard carpentry tools to work on wooden strips and profiles.
- Do not install dark-colored panels and mounting strips (brown, graphite, black, golden oak) in areas exposed to direct sunlight.
- White soffit panels may be installed in the lower part of the roof space and on the gables of the house that are exposed to direct sunlight, provided that the panel length does not exceed 1square meter.
- When installing, take into account the natural dimensional changes in PVC products caused by temperature fluctuations. Panels and mounting strips may change in length by 2.1 mm per 3-meter section for every 10°C difference in temperature.
- Always follow the installation instructions.
Rules for storage of soffits:
- Do not damage the factory packaging;
- Store soffits only in covered areas;
- Make sure the room is well ventilated and that the temperature stays between -40 and +40°C;
- Stack the soffits on pallets or racks in no more than 5 rows high.
Rules for the carriage of soffits:
- The temperature inside the cargo area must not exceed +50°C;
- Packages containing products must not extend beyond the length of the truck bed;
- The soffit must be secured during transport and transported in a covered vehicle;
- Do not stack cargo on the soffit panel, as this causes the product to deform;
- Do not drop, bend, or deform the packaging while unloading.